5 min read
How to start a bullet journal: a simple setup for beginners
Start a bullet journal in one evening: the index, future log, monthly and daily logs, rapid logging symbols, a first-month checklist and how to print your own.
On this page
To start a bullet journal, you need a notebook (dot grid paper is the classic choice), a pen and four basic pages: an index, a future log, a monthly log and your first daily log. You write tasks, events and notes as short bullets with simple symbols, and at the end of each month you move unfinished tasks forward. Everything else, from habit trackers to reading lists, is optional and can wait.
What is a bullet journal?
The Bullet Journal method was created by Ryder Carroll, a designer based in New York, who shared it publicly in 2013. It combines a to-do list, a planner and a diary in one notebook that you set up yourself as you go. “Bullet Journal” is Ryder Carroll’s trademark; this guide explains the basic method in our own words and is not affiliated with him. For printable layouts, see the bullet journal ideas page.
The core parts of a bullet journal
| Part | What it is | Pages |
|---|---|---|
| Index | A table of contents: topic and page numbers | 2 |
| Future log | The coming months, with events, deadlines and birthdays | 2 to 4 |
| Monthly log | A list or calendar of the month’s dates, plus a task list | 2 |
| Daily log | Tasks, events and notes written day by day | As many as you need |
| Collections | Pages for one topic: lists, trackers, project notes | As needed |
Number every page and add each collection to the index. That is what makes things findable later.
Rapid logging: the bullet symbols
Instead of full sentences, you write short entries, each starting with a symbol:
| Symbol | Meaning |
|---|---|
| • | Task (something to do) |
| ○ | Event (something that happens on a date) |
| – | Note (information to remember) |
| X | Task done (written over the dot) |
| > | Task migrated (moved to the next month or a collection) |
| < | Task scheduled (moved to the future log) |
A daily log might read: ”• call the dentist”, ”○ team lunch 12:30”, ”– Sam recommended a book on bread baking”, and in the evening the dentist task gets an X.
Monthly migration is the heart of the method. At the end of each month, go through every open task. If it still matters, migrate it (>) to the new month’s task list. If it belongs to a later month, schedule it (<) in the future log. If it no longer matters, cross it out. Rewriting tasks by hand makes you notice the ones you keep putting off.
Your first-month setup checklist
Set up only these pages before you start:
- Pages 1–2: Index (leave them blank for now).
- Pages 3–6: Future log, for example six months with three months per page.
- Page 7: Monthly calendar: the dates of the month down the left side, or a calendar grid.
- Page 8: Monthly task list.
- Page 9: A habit tracker for the month (optional).
- Page 10 onwards: Daily log, starting today.
Then fill in the index: Future log 3–6, the month’s name 7–9, Daily log 10. Add new collections whenever you need them.
Popular collections to add later
| Collection | What it holds | Printable page |
|---|---|---|
| Habit tracker | Daily habits in a monthly grid | Habit Tracker |
| Mood tracker | One mood rating per day | Mood Tracker |
| Reading list | Books to read and notes on finished ones | Reading Journal |
| Gratitude log | A few good things each day | Gratitude Journal |
| Meal plan | The week’s meals and shopping | Meal Planner |
| Finance tracker | Spending against a budget | Expense Tracker |
For ideas on what to track, see habit tracker ideas.
Tips for beginners
- Start minimal. Use only the core pages for the first month. Add collections when you miss them, not because they look good online.
- No art required. The method is about getting things done. Decorated spreads are a hobby you can add later, or never.
- Plan one month at a time. Do not draw the whole year in advance; your needs will change.
- Skipping days is fine. The next entry simply starts with the new date.
- Test your pens on the last page before writing on the first. Markers may need heavier paper (see choosing paper).
Dot grid paper with 5 mm spacing in A5 is the classic choice: the dots guide your writing, boxes and tables but stay in the background.
Print your own bullet journal
You can print a bullet journal that already contains the pages you need:
- Open Dot Grid in A5.
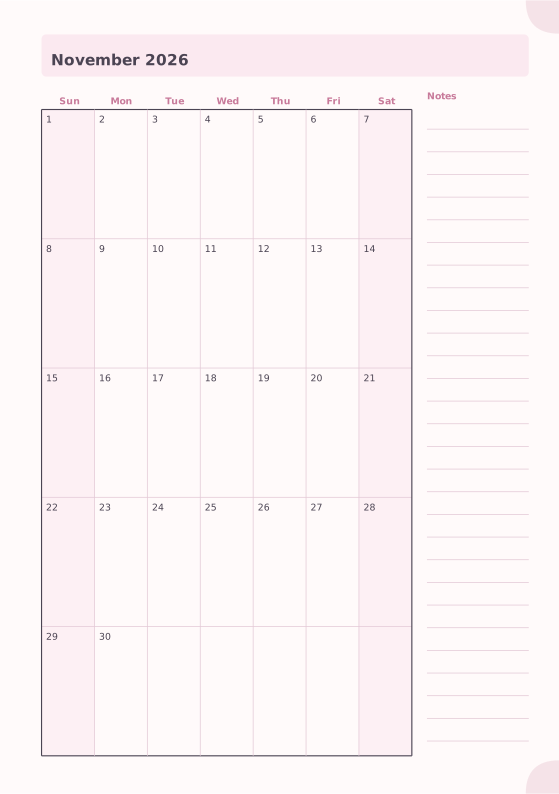
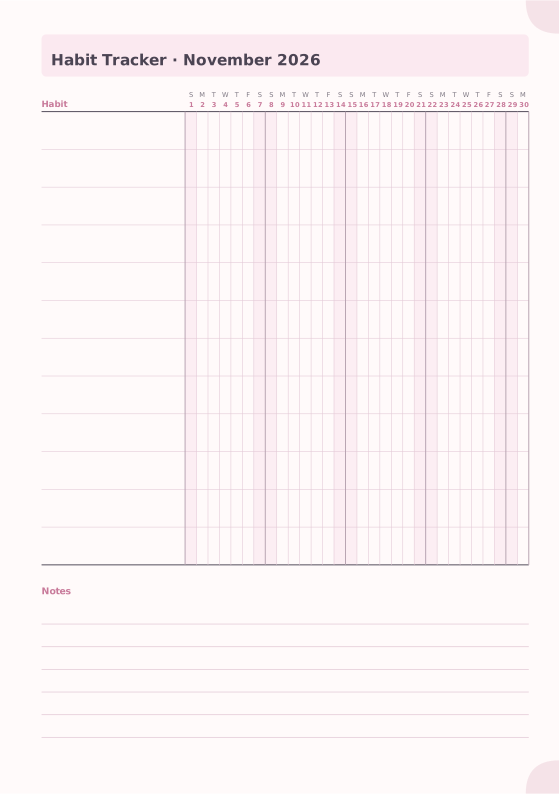
- Use Add pages with Insert: At the beginning to put a Monthly Planner and a Habit Tracker in front of the dot grid pages. Both are dated, so the month names and days are printed for you.
- Turn on Print page numbers under Notebook so your index works.
- Open Download PDF and choose Print-ready booklet. A5 prints on A4; for Half Letter pages, use Letter paper.
- Print double-sided at 100%, fold and staple. For more than about 12 to 15 sheets, choose Signatures (sew).
Prefer a ready-made start? In My notebooks, open the Collection wizard and choose Dot grid journal. It builds a future log, a month calendar, a habit tracker, a mood tracker and dot grid pages for each month, with a matching cover.
FAQ
What do I need to start a bullet journal?
A notebook, a pen and about an hour. Dot grid paper is the most popular choice, but lined or blank pages work too.
What size is best for a bullet journal?
A5 (148 × 210 mm) is the classic size. In North America, Half Letter (5.5 × 8.5 in) is a close equivalent; B5 gives more room if you write a lot.
What is the difference between > and < in a bullet journal?
”>” means a task was migrated, moved forward to the next month or into a collection. ”<” means it was scheduled, moved back into the future log for a specific later month.
Do I have to decorate my bullet journal?
No. The original method is plain and functional. Many people enjoy decorating, but it is not needed for the system to work.
Featured templates
Start from a template, then change line spacing, dates, colors and layout options.